Ordering a VPS Server
This guide will show you how to order a virtual server at NuxtCloud.
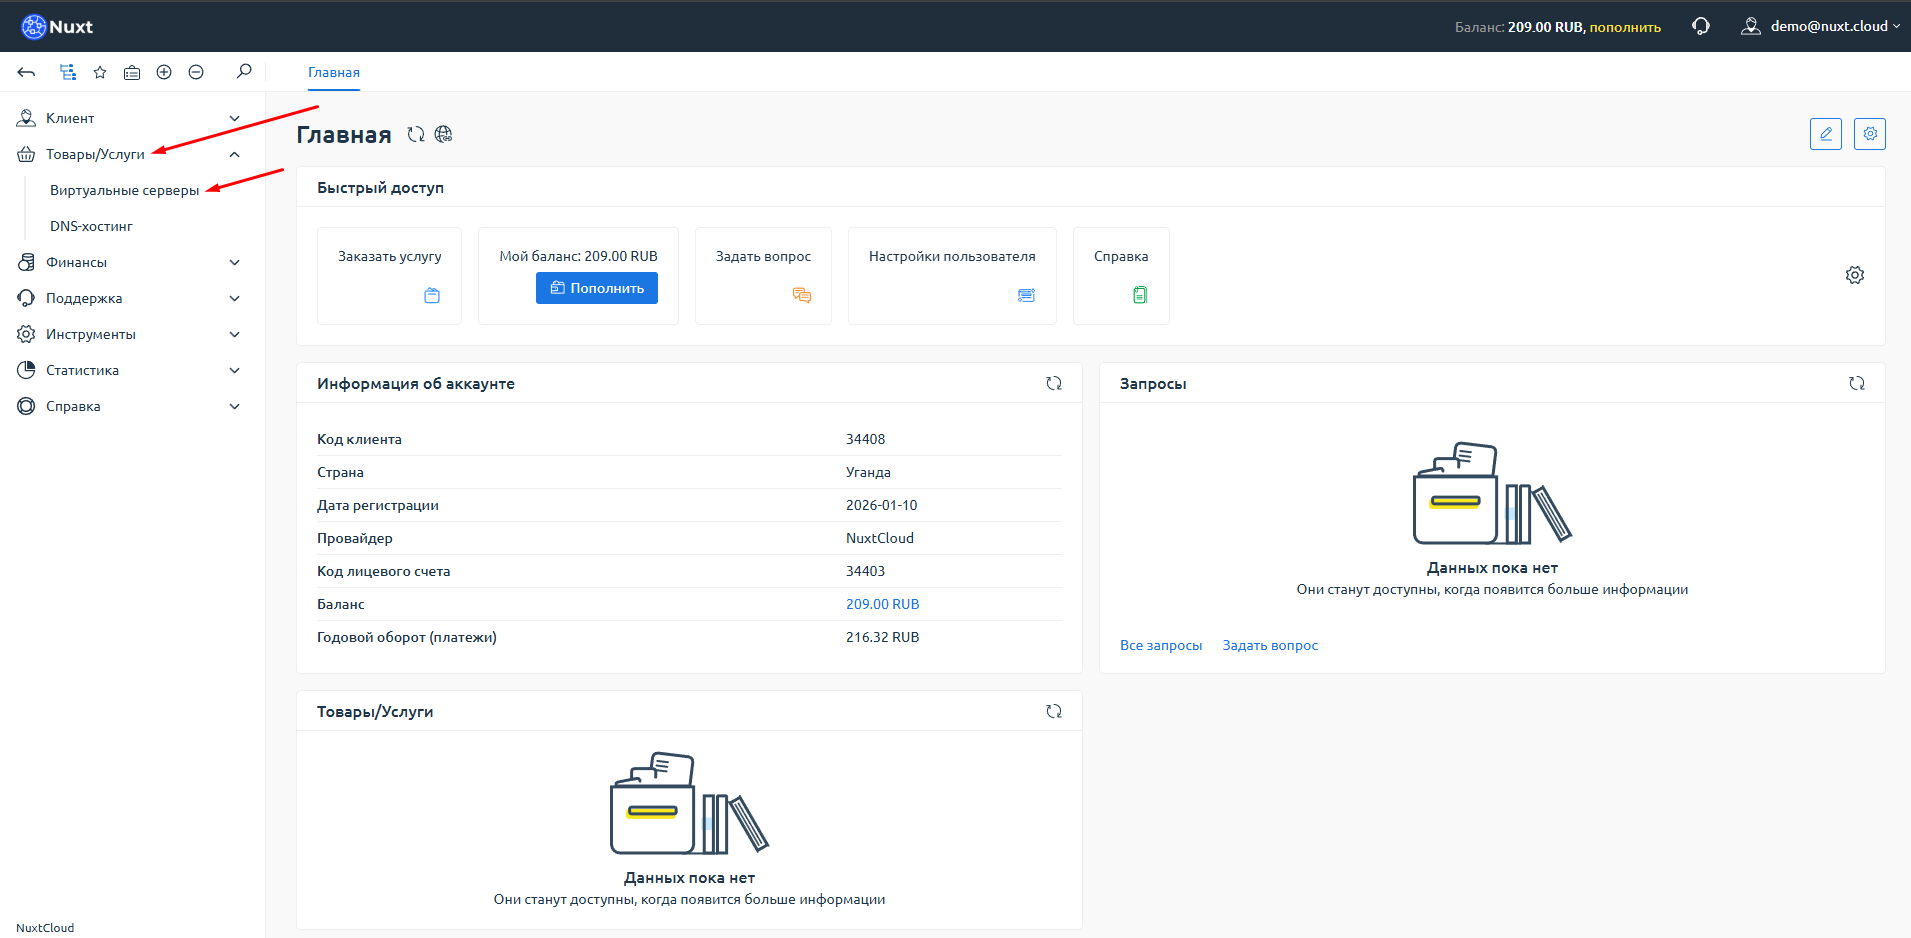
Step 1: Open the virtual servers section
Log in to your control panel. In the left menu, find Products/Services, expand it and select Virtual Servers.
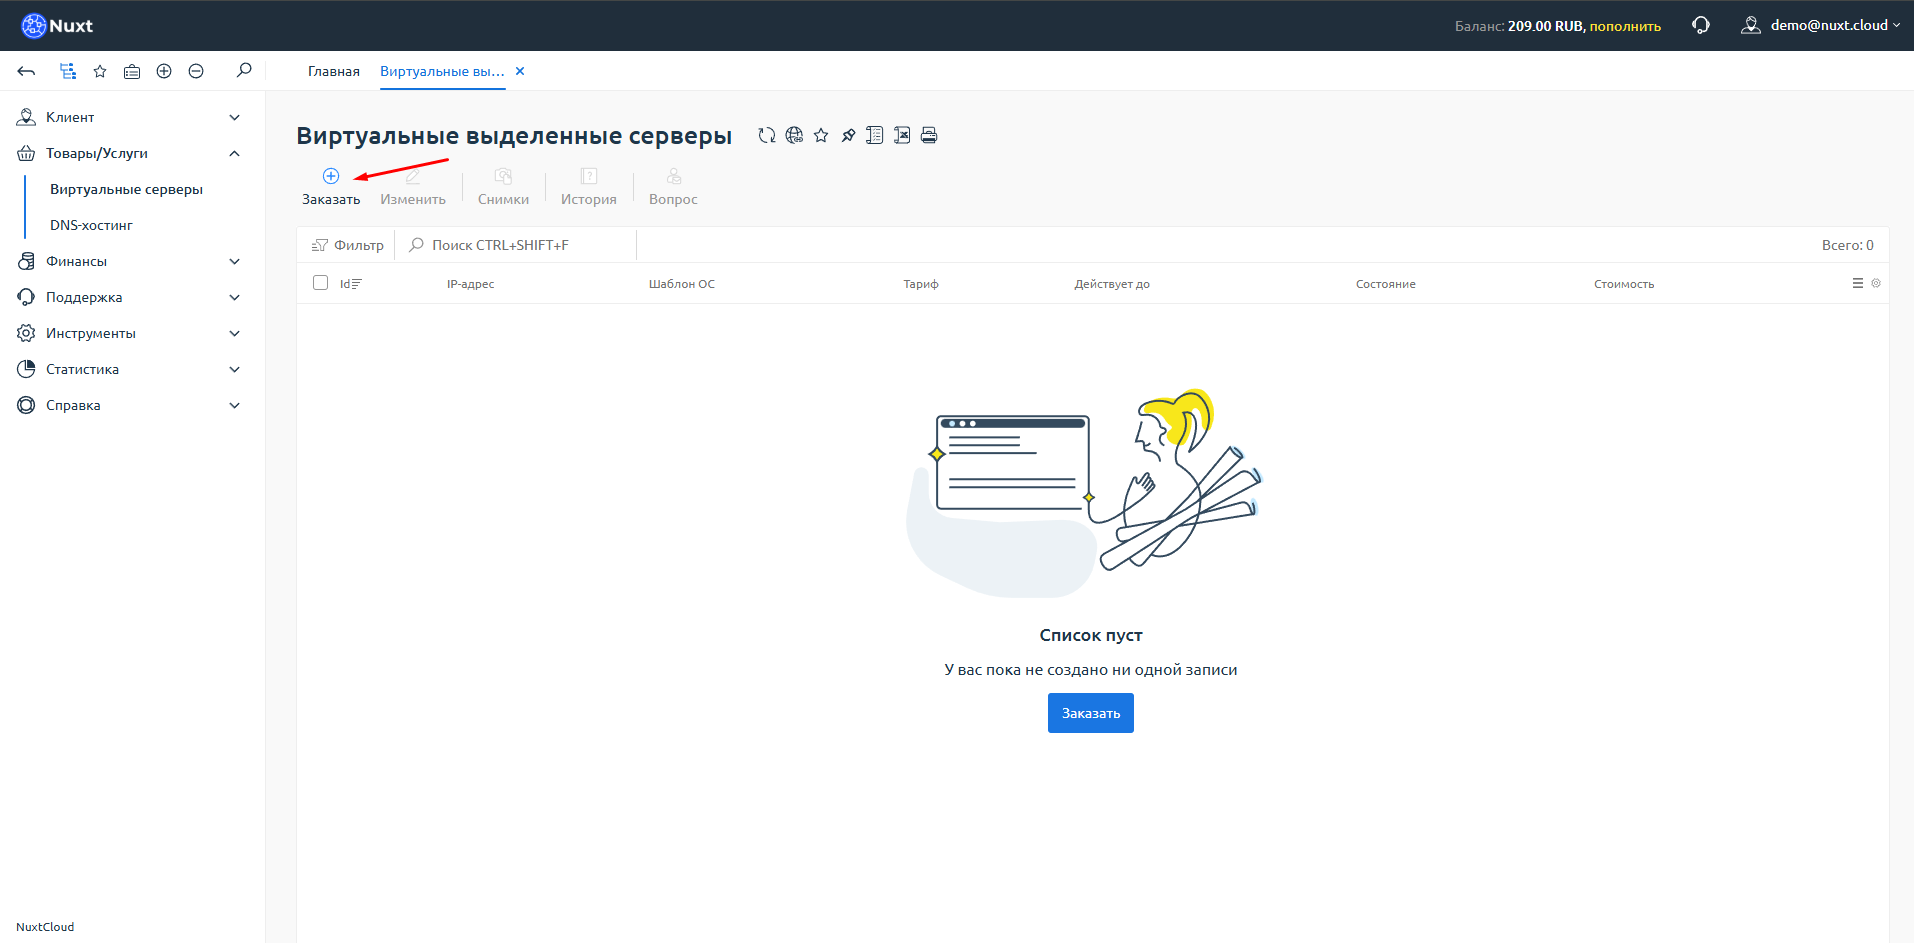
Step 2: Click "Order"
You will be taken to the virtual servers page. If you haven't ordered anything yet, it will display "List is empty". Click the "Order" button.
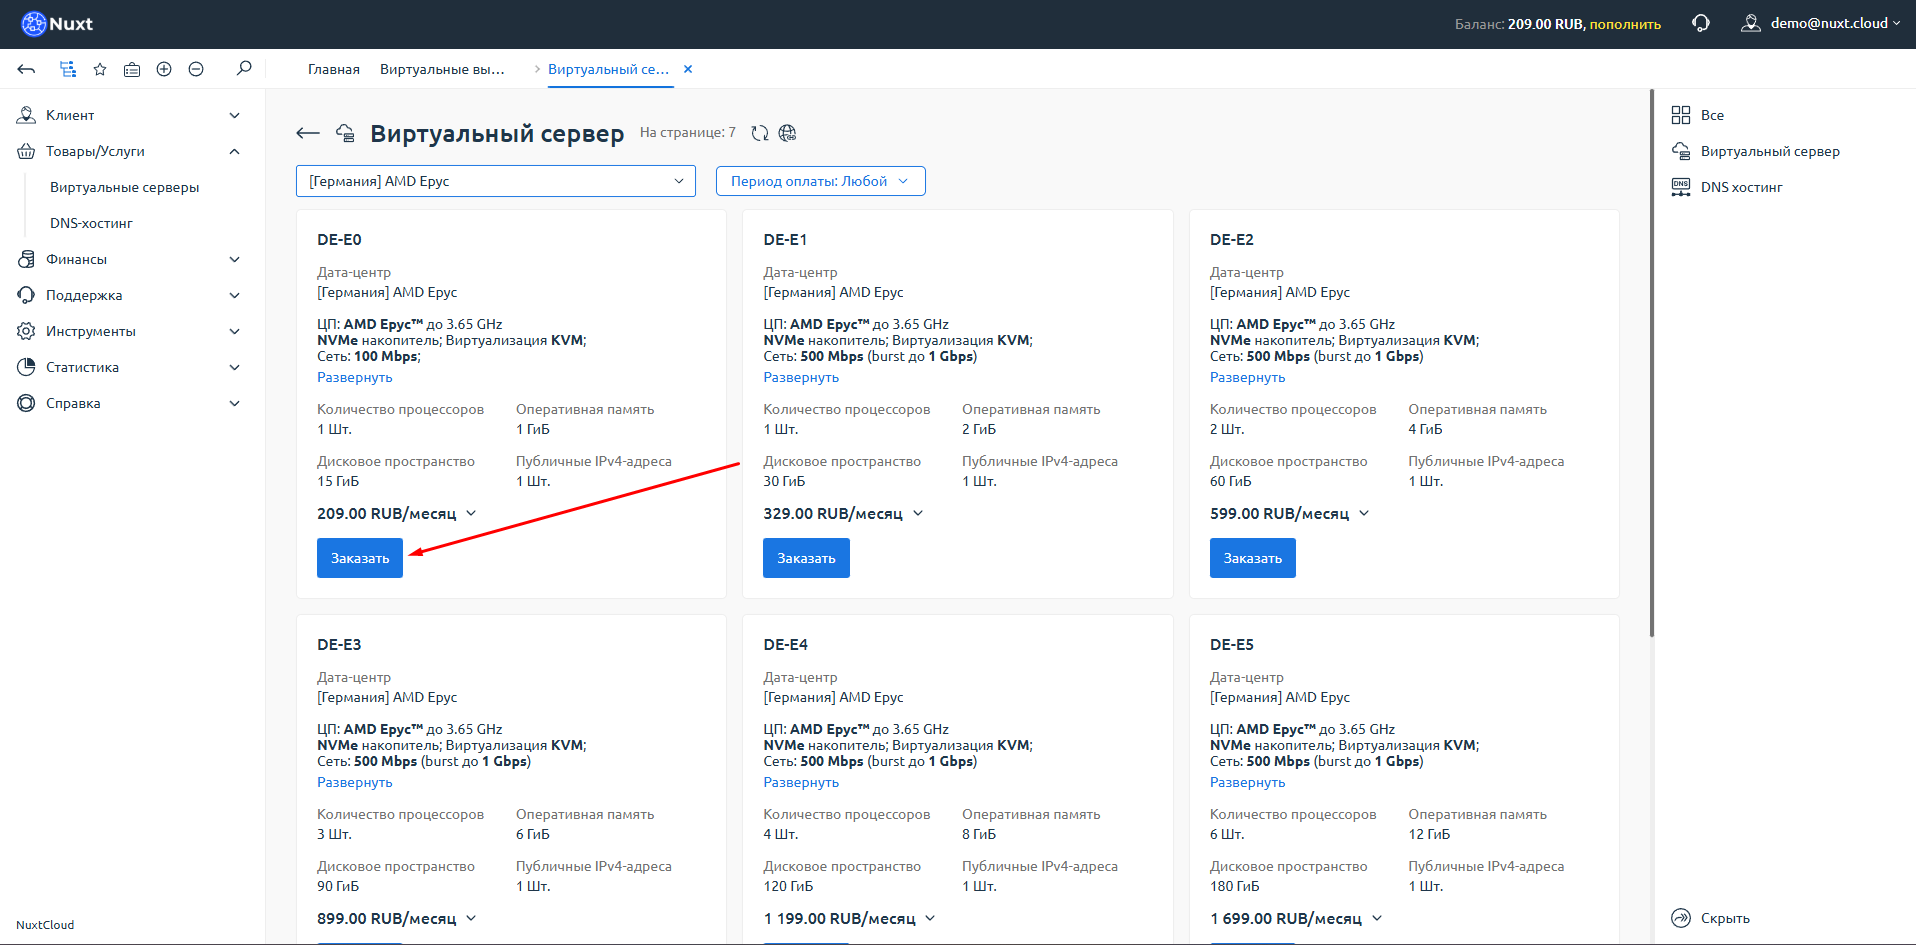
Step 3: Select location and pricing tier
You will be taken to the catalog of available services.
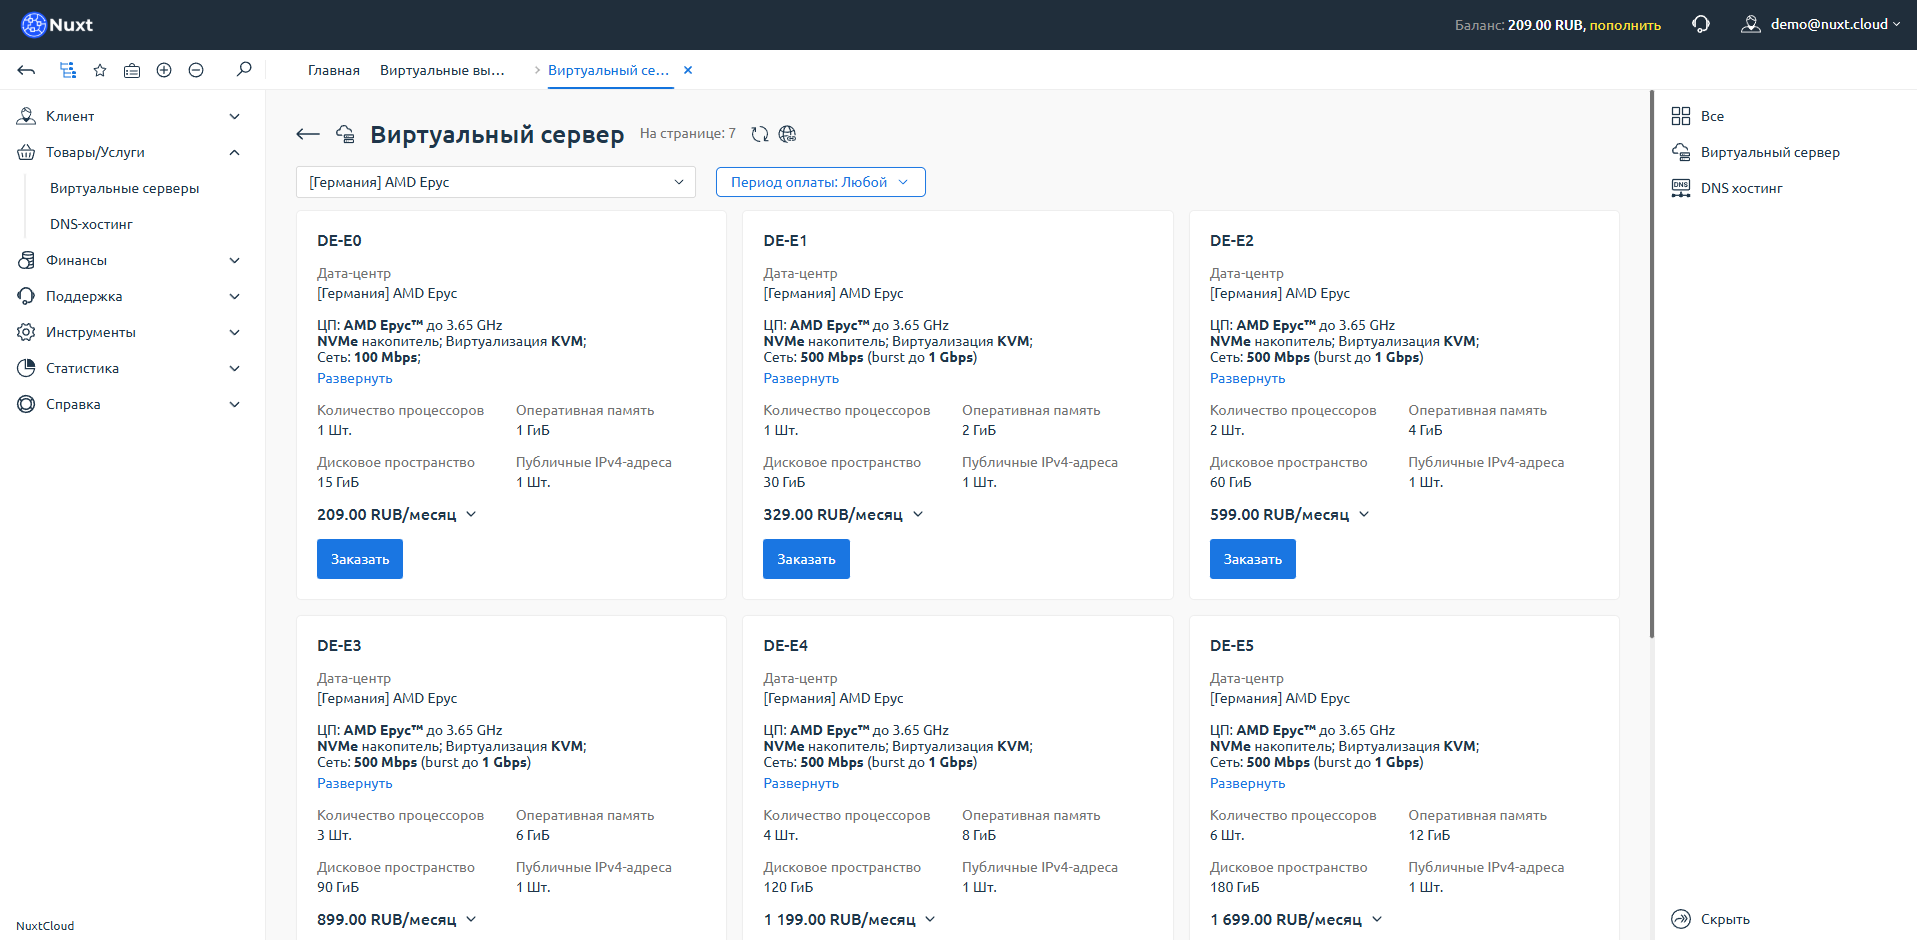
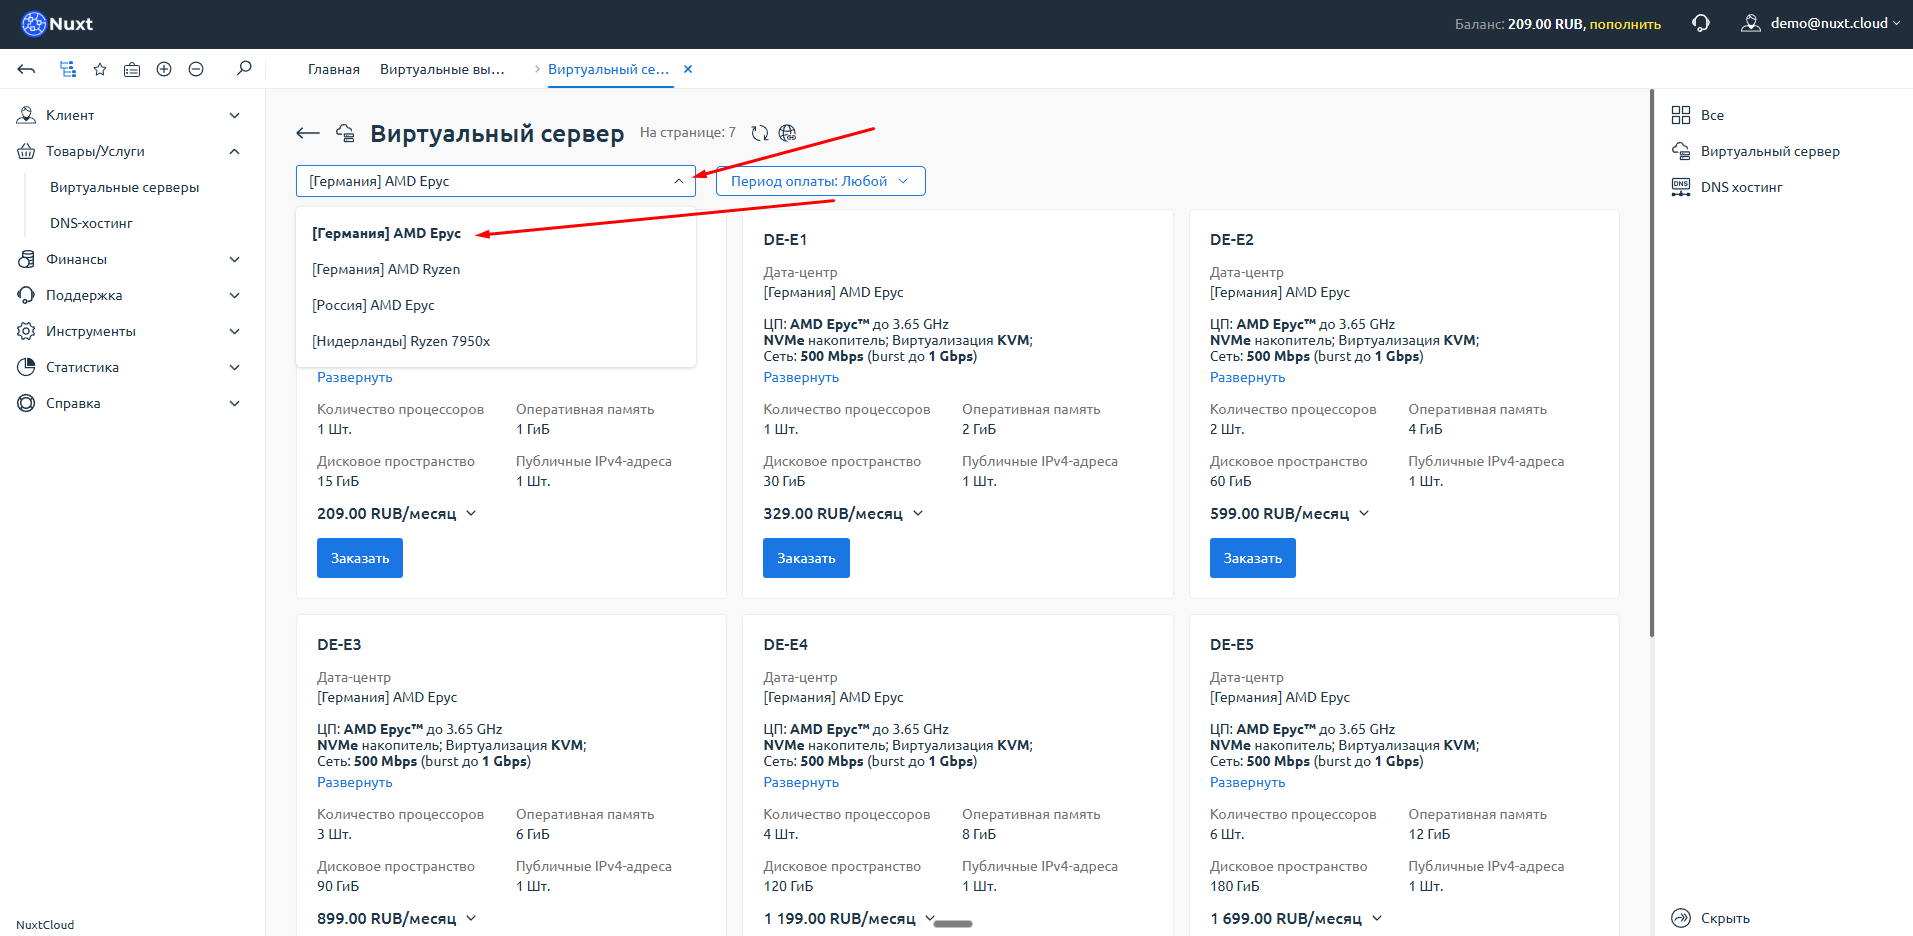
Below the "Virtual Server" heading, there is a selector where you can choose:
- Location (server country)
- Pricing tier (processor type)
In this example, we select: Germany, AMD EPYC.
Step 4: Choose a plan
Select a suitable plan and click "Order".
Discounts for longer periods
Click on the price to select payment period. Discounts apply:
- 3 months — 5% off
- 6 months — 10% off
- 12 months — 15% off
Note the "Expand" button — it shows all plan specifications and conditions.
Step 5: Configure the server
After clicking "Order", the server configuration page will open. It displays the selected plan and location.
Available settings:
| Parameter | Description |
|---|---|
| Domain name | PTR record for the server (optional, can be left empty) |
| Operating system | Select the desired OS from the list |
| Pre-installed software | Depends on the selected OS |
Please note
We do not provide domain names, even technical ones. If you don't have a domain, leave this field empty.
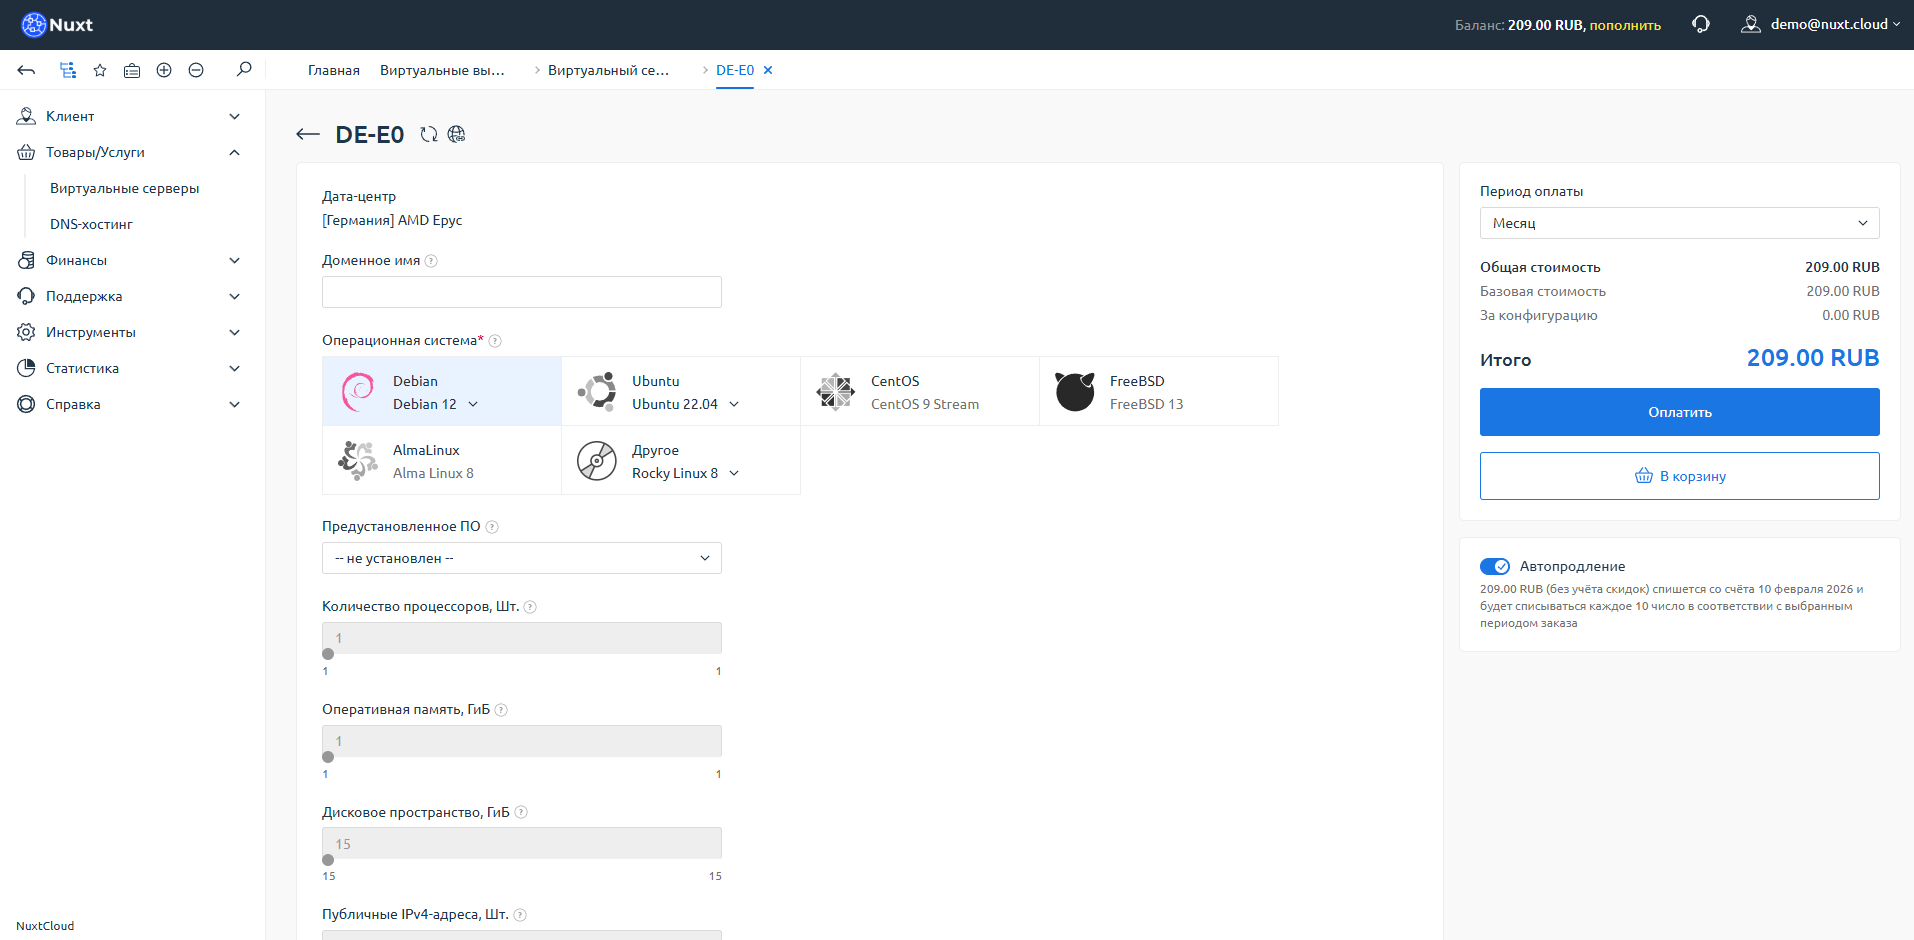
Additional IP addresses:
On some plans (e.g., DE-E0) additional IPs are not available. On other plans, you can order up to 16 additional IPs at 99 rubles/month each.
Auto-renewal:
On the right, you can select the payment period and enable auto-renewal. With sufficient balance, the service will be renewed automatically.
When all settings are configured, click "Pay".
Step 6: Select payment method
You will be taken to the payment method selection page.
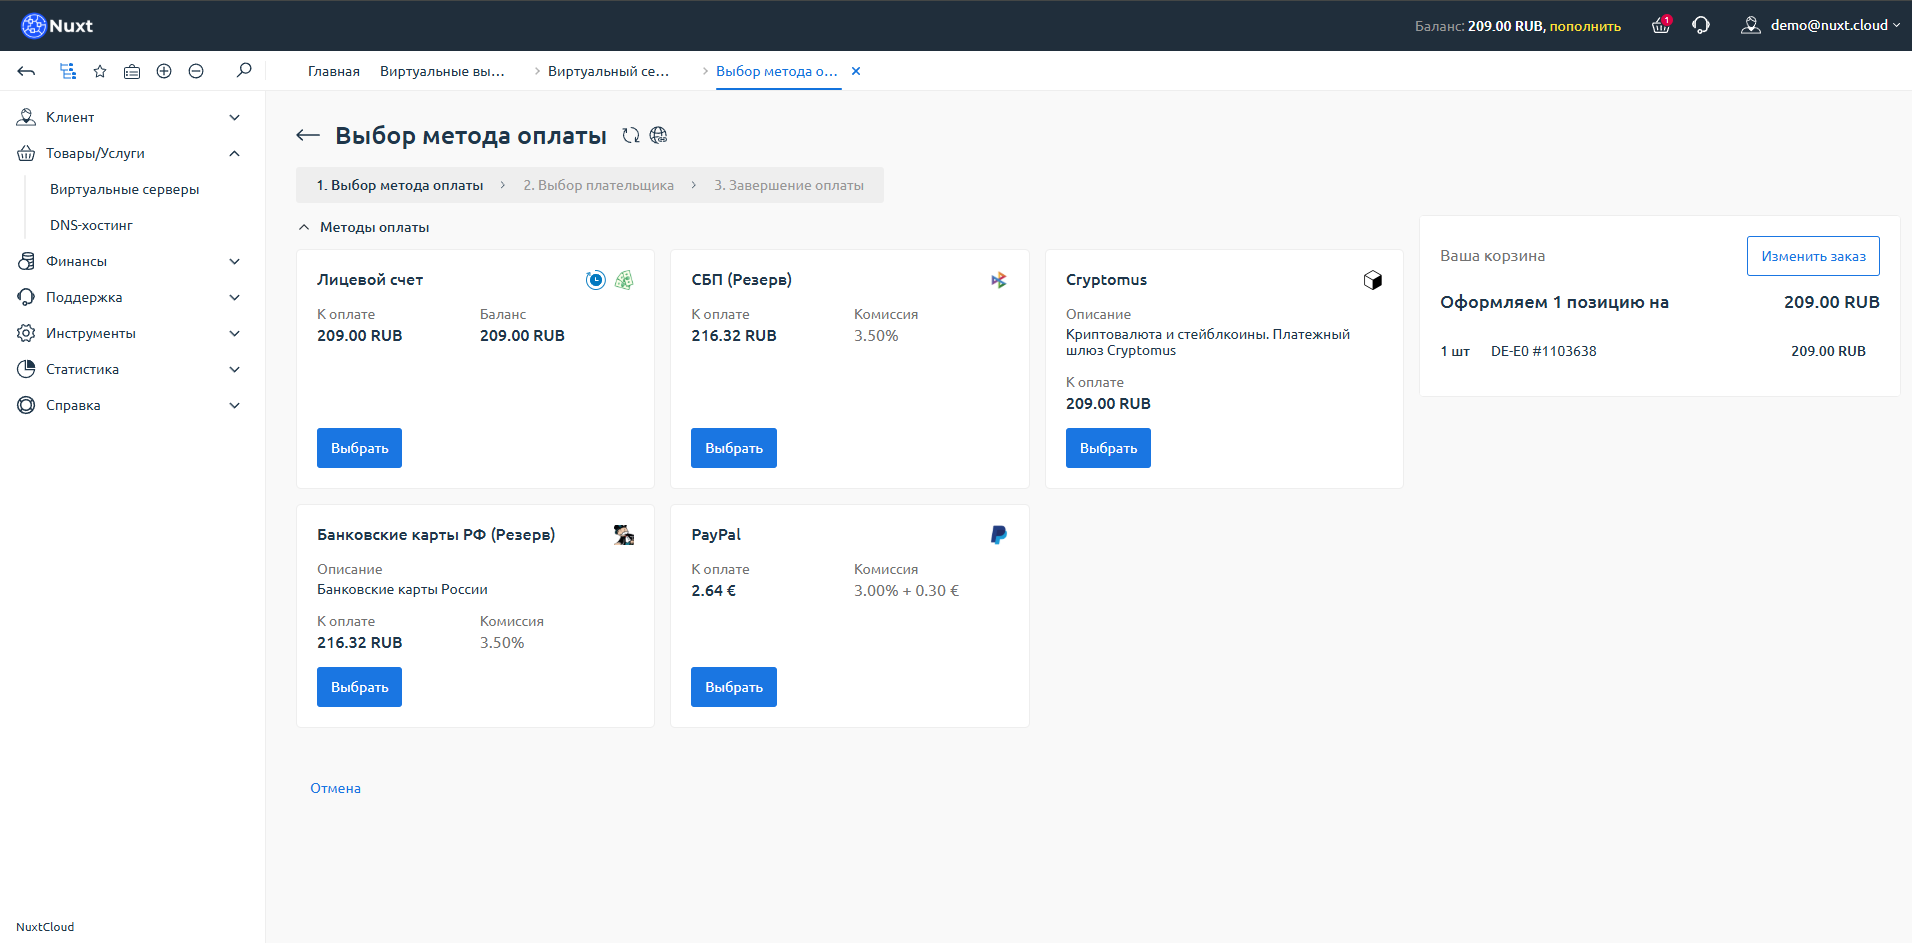
If you topped up your balance beforehand (see Adding Funds), select "Account Balance" and click "Select".
Step 7: Confirm payment
A confirmation window will open with complete order information: total amount, selected parameters, and other details.
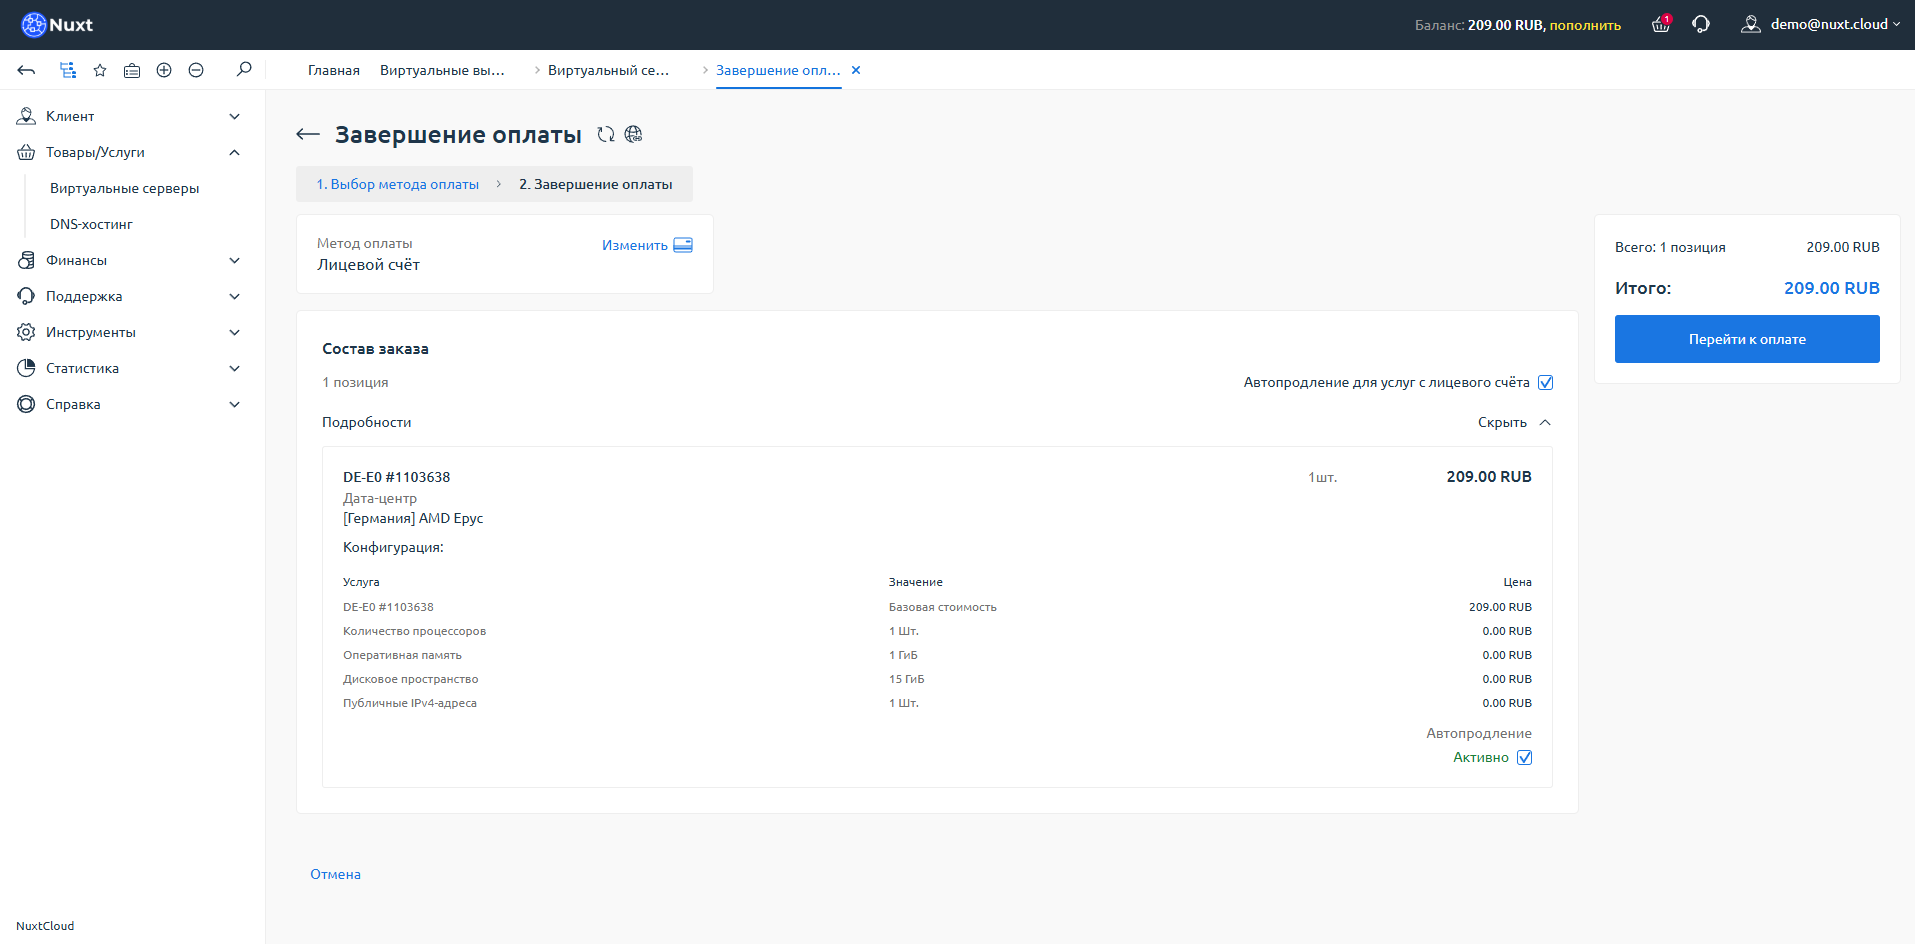
Review the details and click "Proceed to Payment".
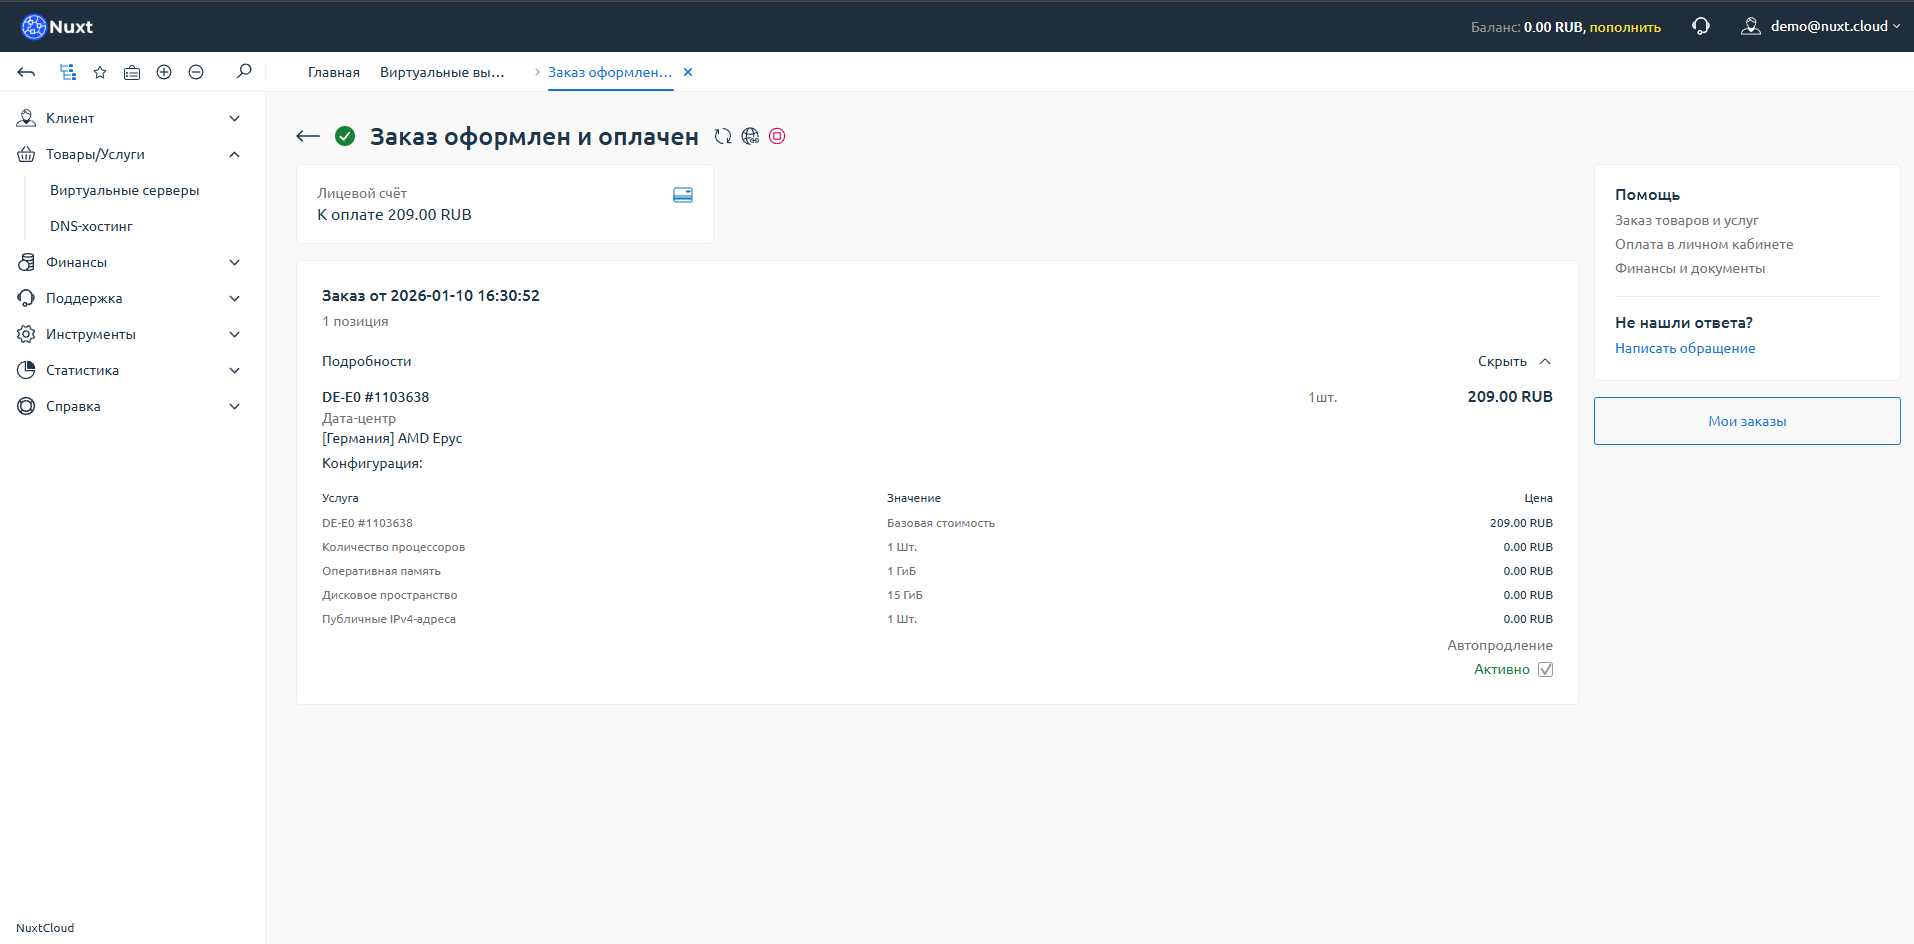
Order placed and paid!
Congratulations! Your order has been successfully placed.
Step 8: Wait for server activation
Go to the Virtual Servers section in the left menu.
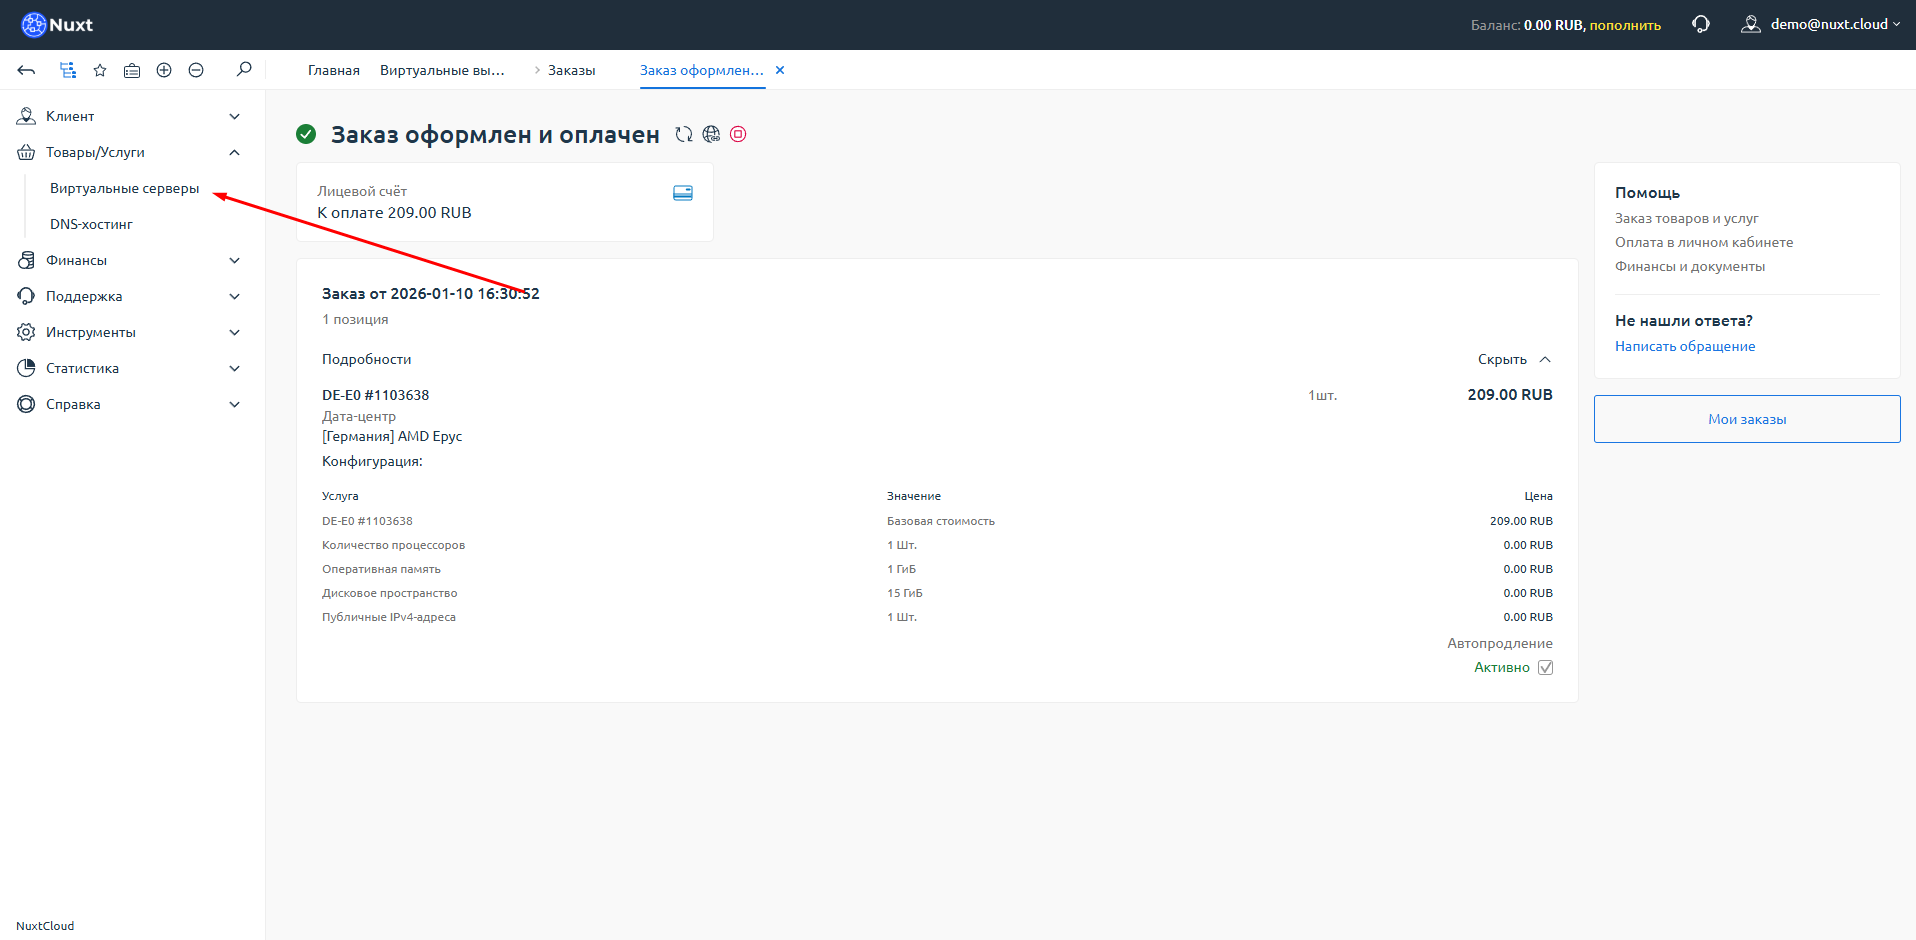
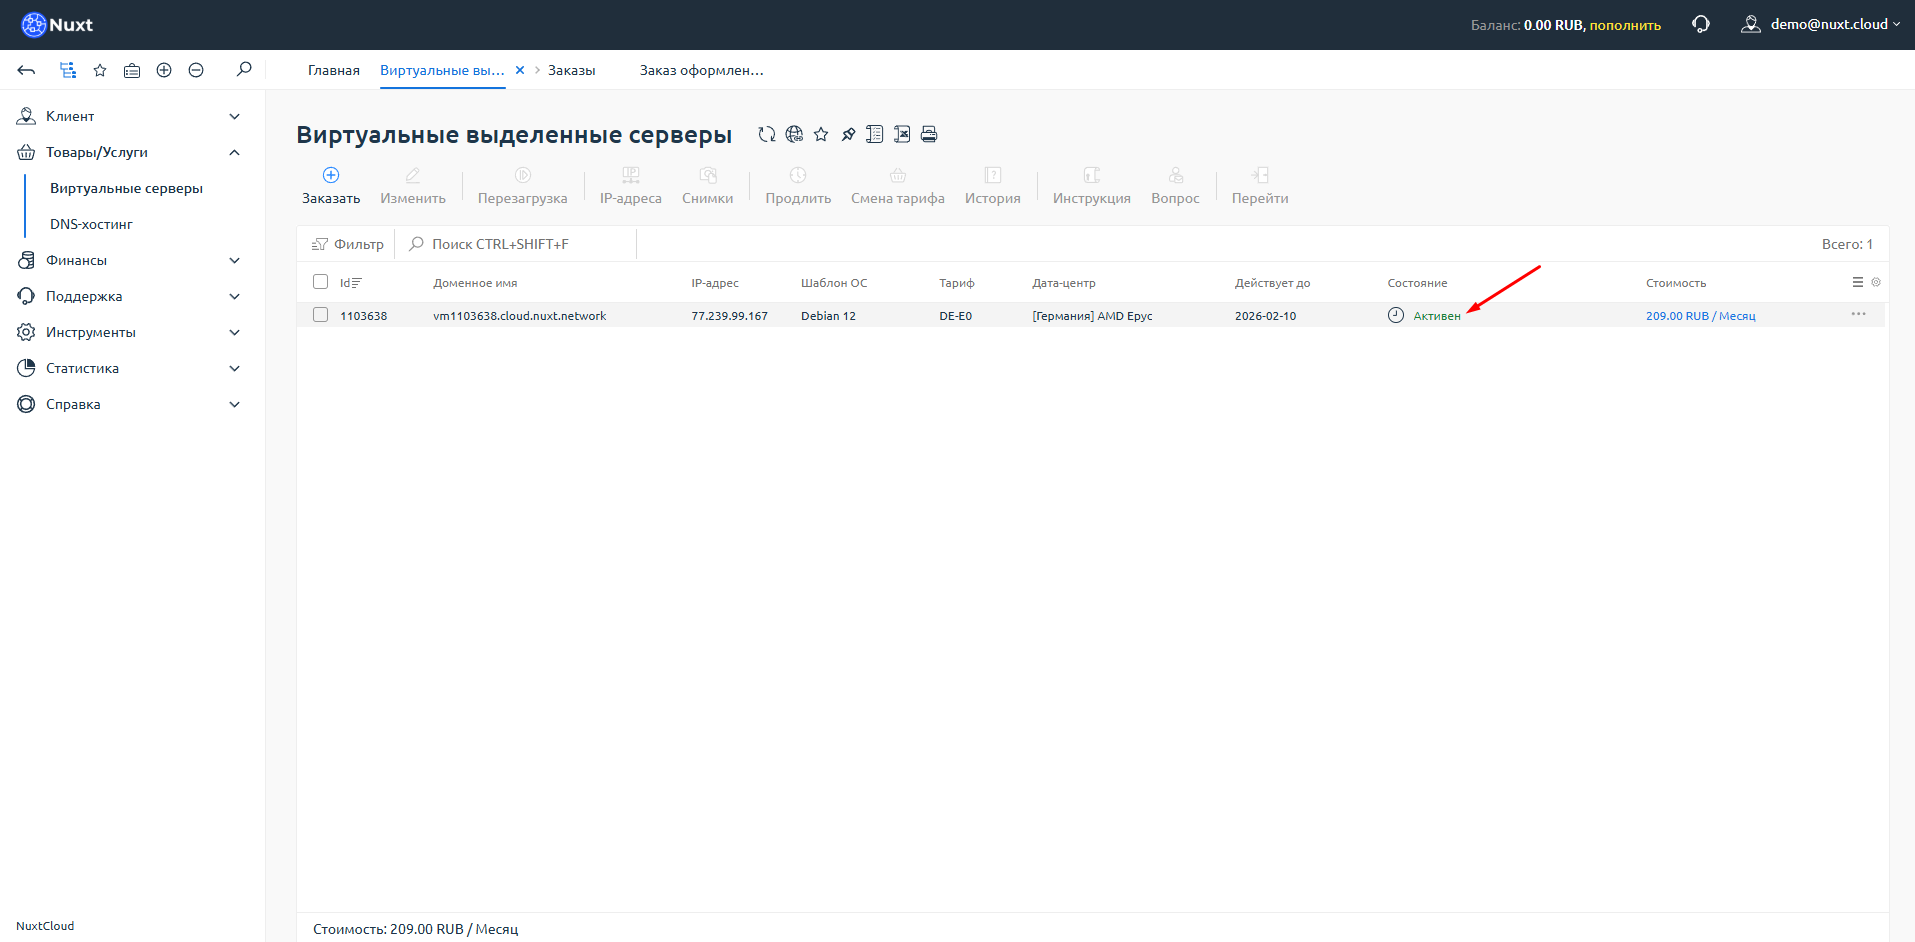
Your server should appear in the list. Activation usually takes 2 to 15 minutes.
If status is "Processing" for more than 15 minutes
Most likely, there are no available slots or IP addresses for the selected location. You can:
- Wait for resources to become available (contact support for timing)
- Request a refund to your balance and order a server in a different location or pricing tier
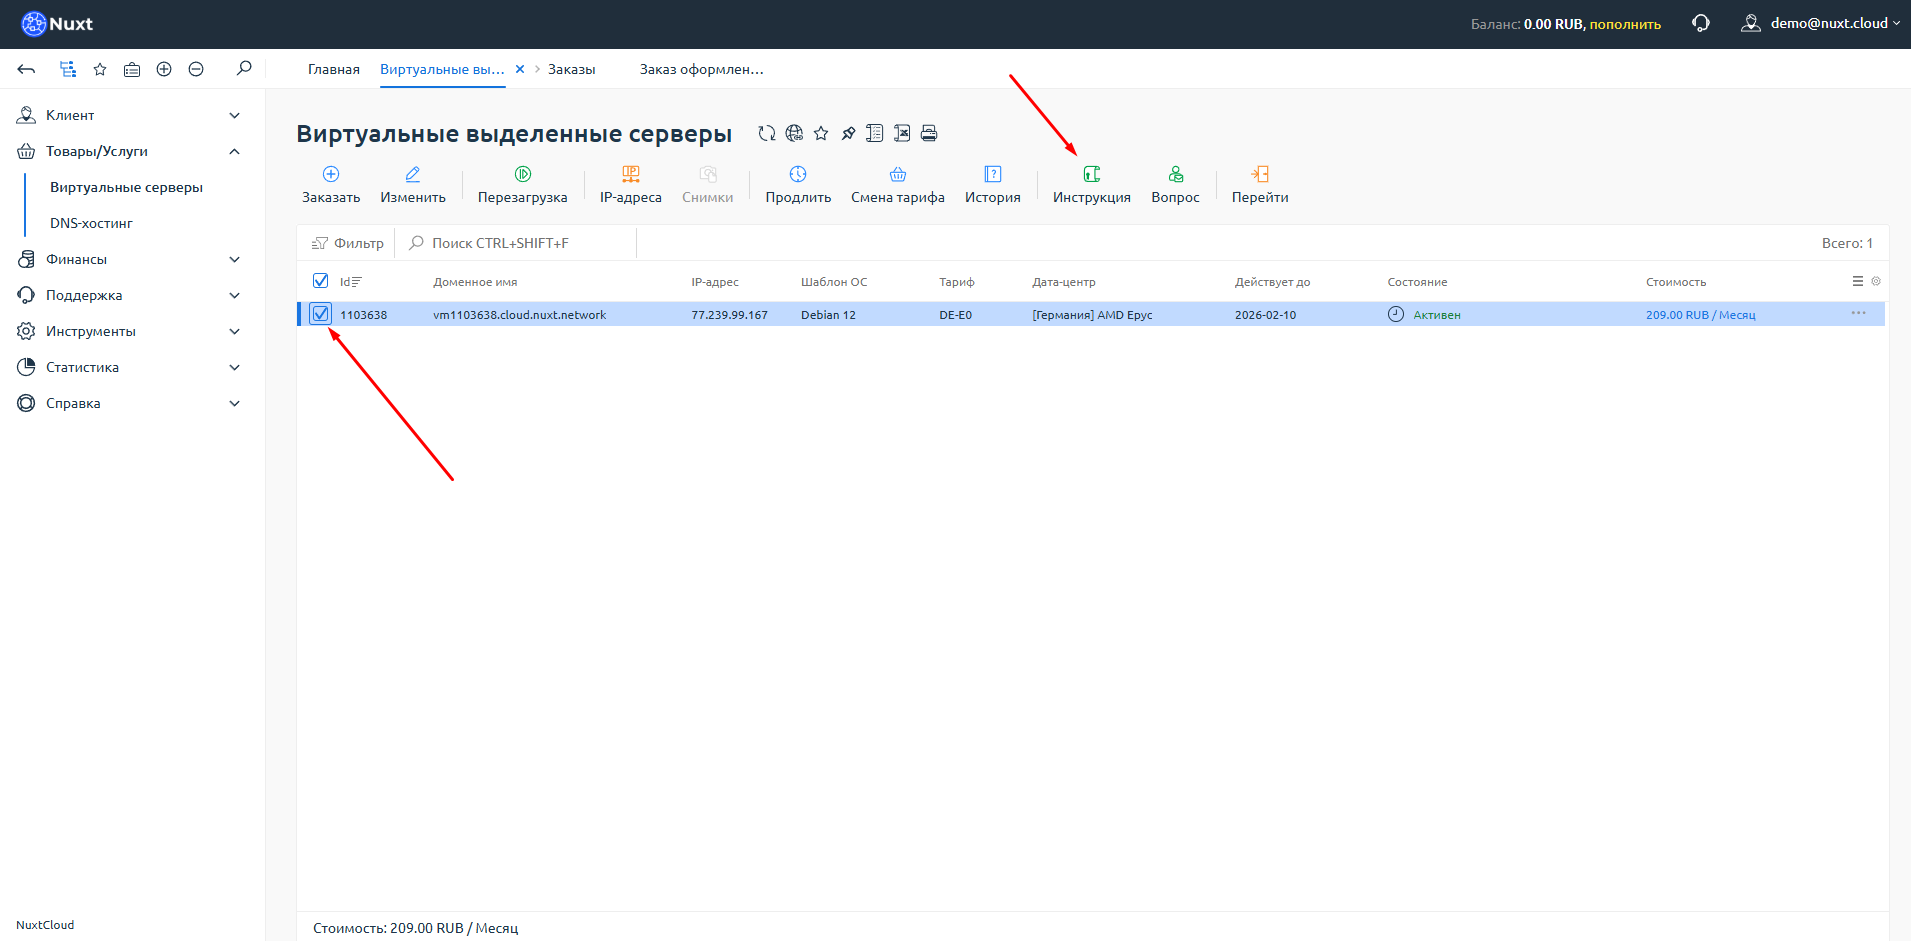
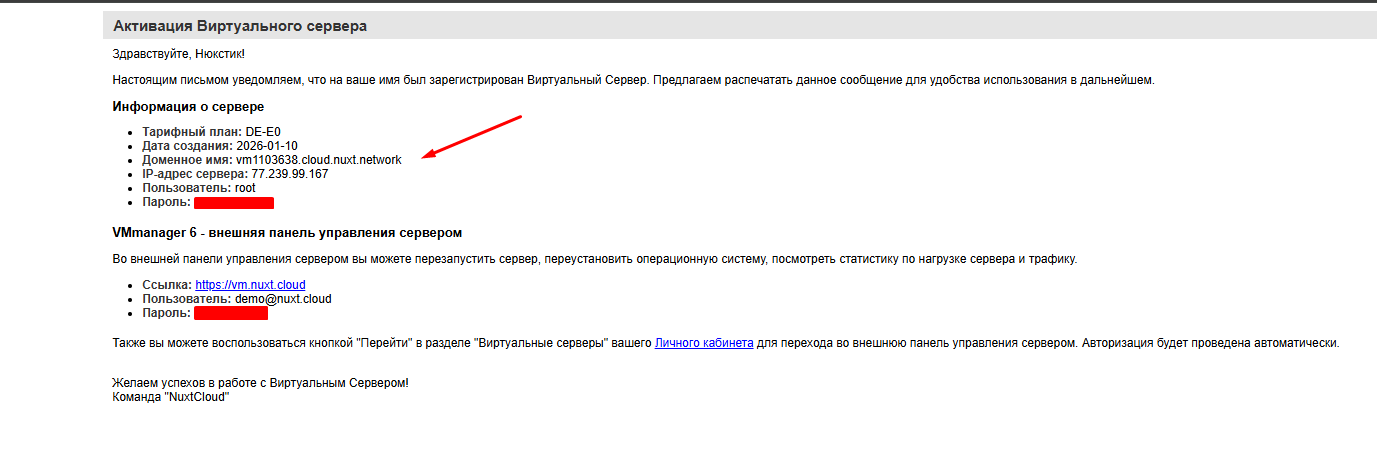
Step 9: Get connection details
When the server status changes to "Active", select it with a checkbox and click the "Instructions" button in the top panel.
A page with connection details will open. The "Server Information" column shows the IP address, login, and password.
Important!
When you reinstall the server, the password will change, but it will NOT update automatically in the instructions. The new password will be sent to your email.
Done!
Congratulations! Your virtual server is ready to use.