Creating a Support Ticket
This guide will show you how to create a support request at NuxtCloud.
Important
Since 2024, we no longer provide support via email. All requests are accepted only through the control panel.
Step 1: Open the "Requests" section
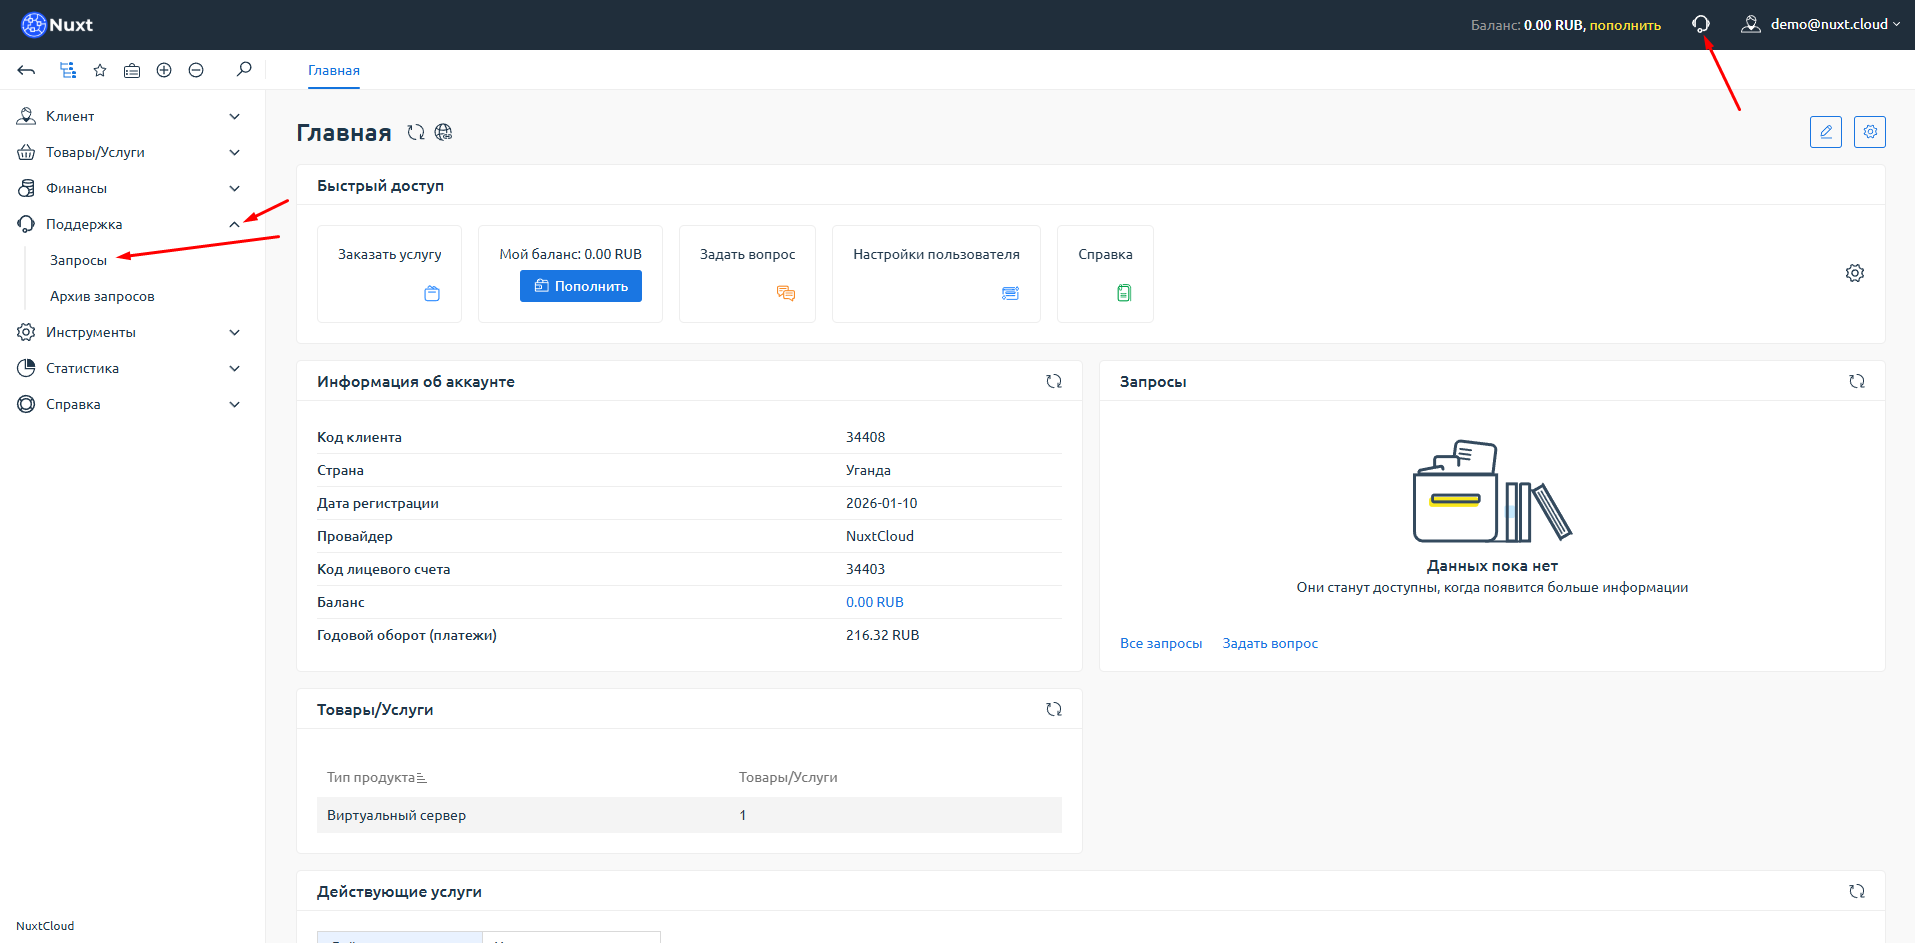
Log in to your control panel. There are two ways to open the support section:
- In the left menu, expand Support and click Requests
- Or click the headset icon to the right of the yellow "Top Up" button in the top right corner
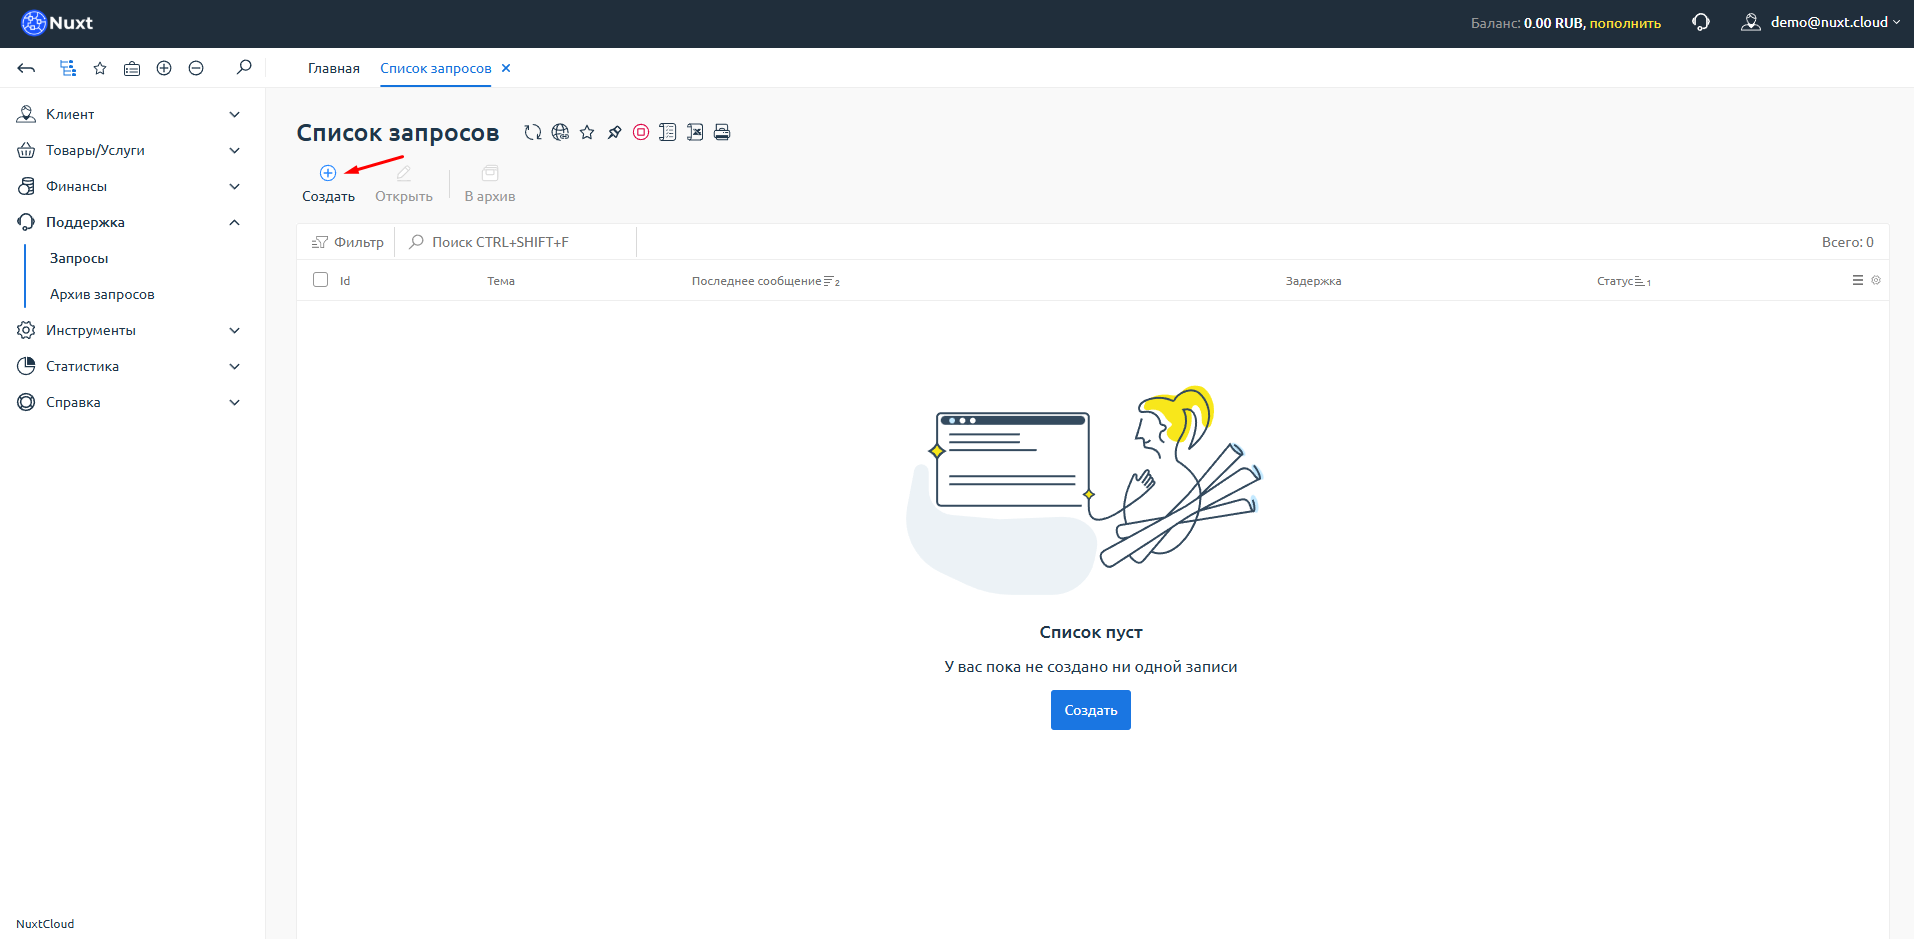
Step 2: Create a new request
You will be taken to the list of requests. Click the "Create" button.
Step 3: Fill out the request form
A request creation window will open.
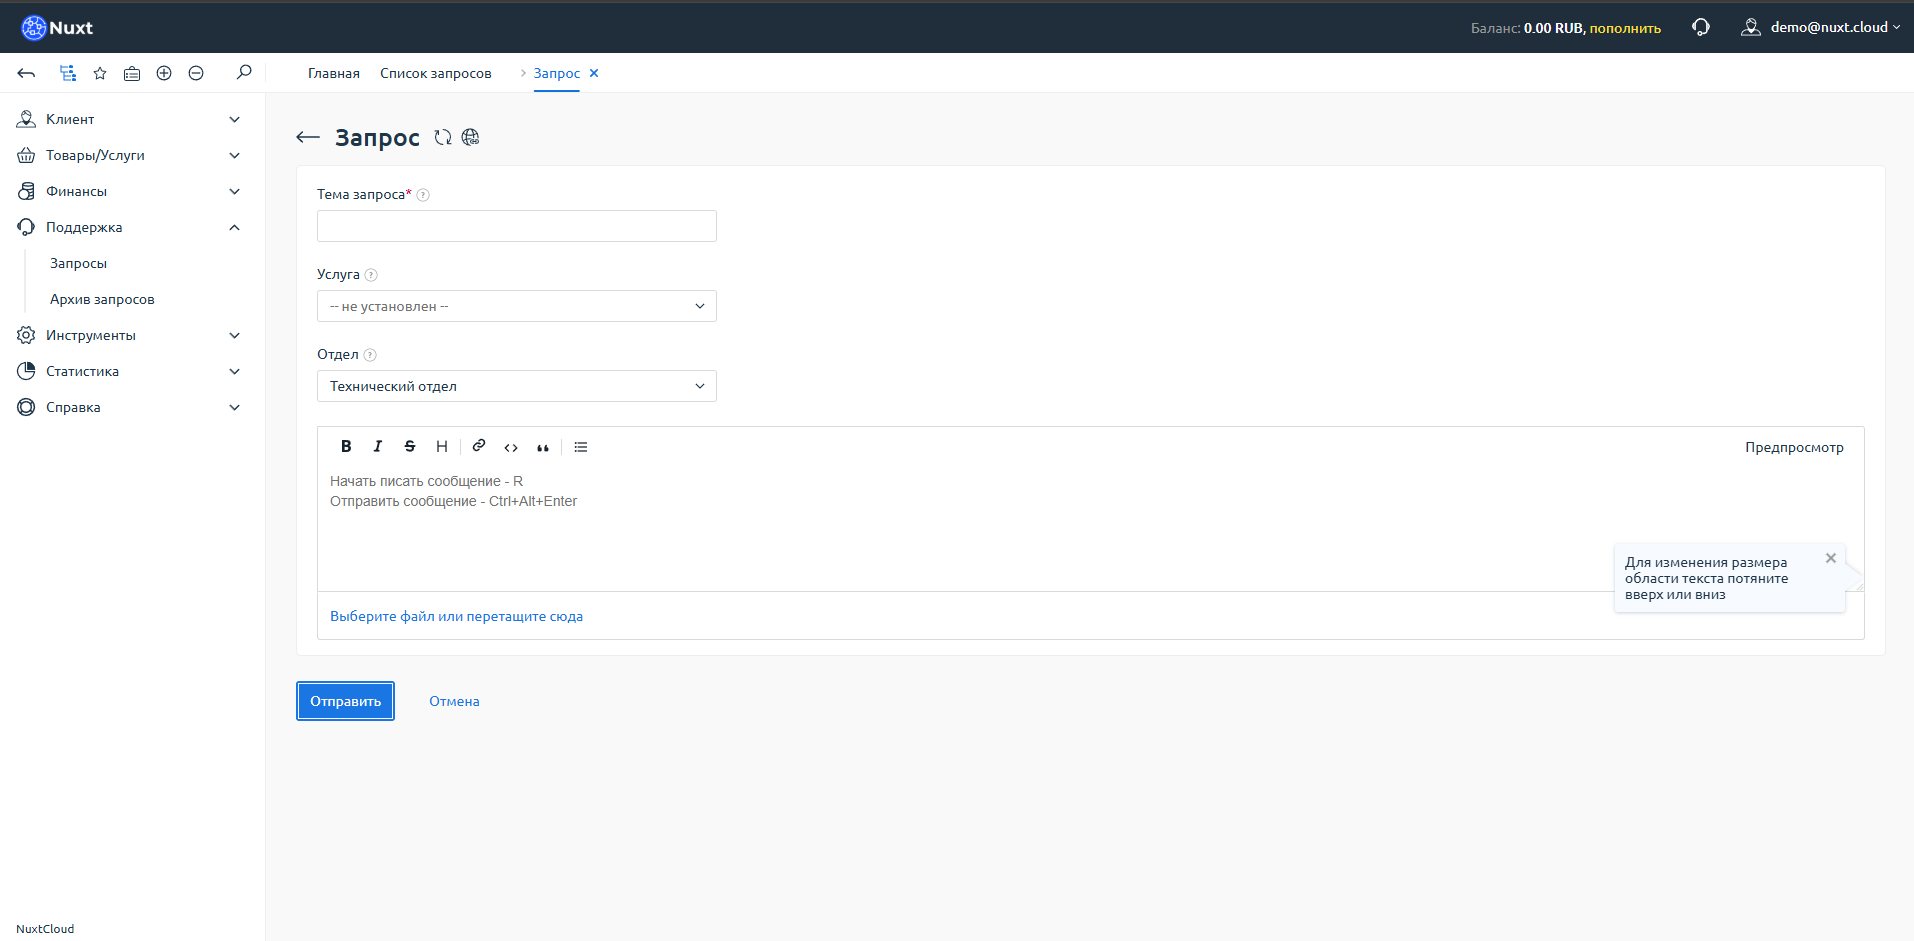
Fill in the following fields:
| Field | Description |
|---|---|
| Subject | Briefly describe the issue. Be as specific as possible! |
| Service | Select the service related to your question (if general — you can skip this) |
| Department | Select the appropriate department |
Available departments:
- Technical Department — server operation, configuration, technical issues
- Sales Department — pricing, payments, promotions
- Corporate Department — documents, contracts, invoices for organizations
Attention!
Select the correct department, otherwise your request may be ignored.
Then describe your issue in detail in the text field.
Do not use AI-generated text
Requests written with neural networks may be ignored. Write in your own words.
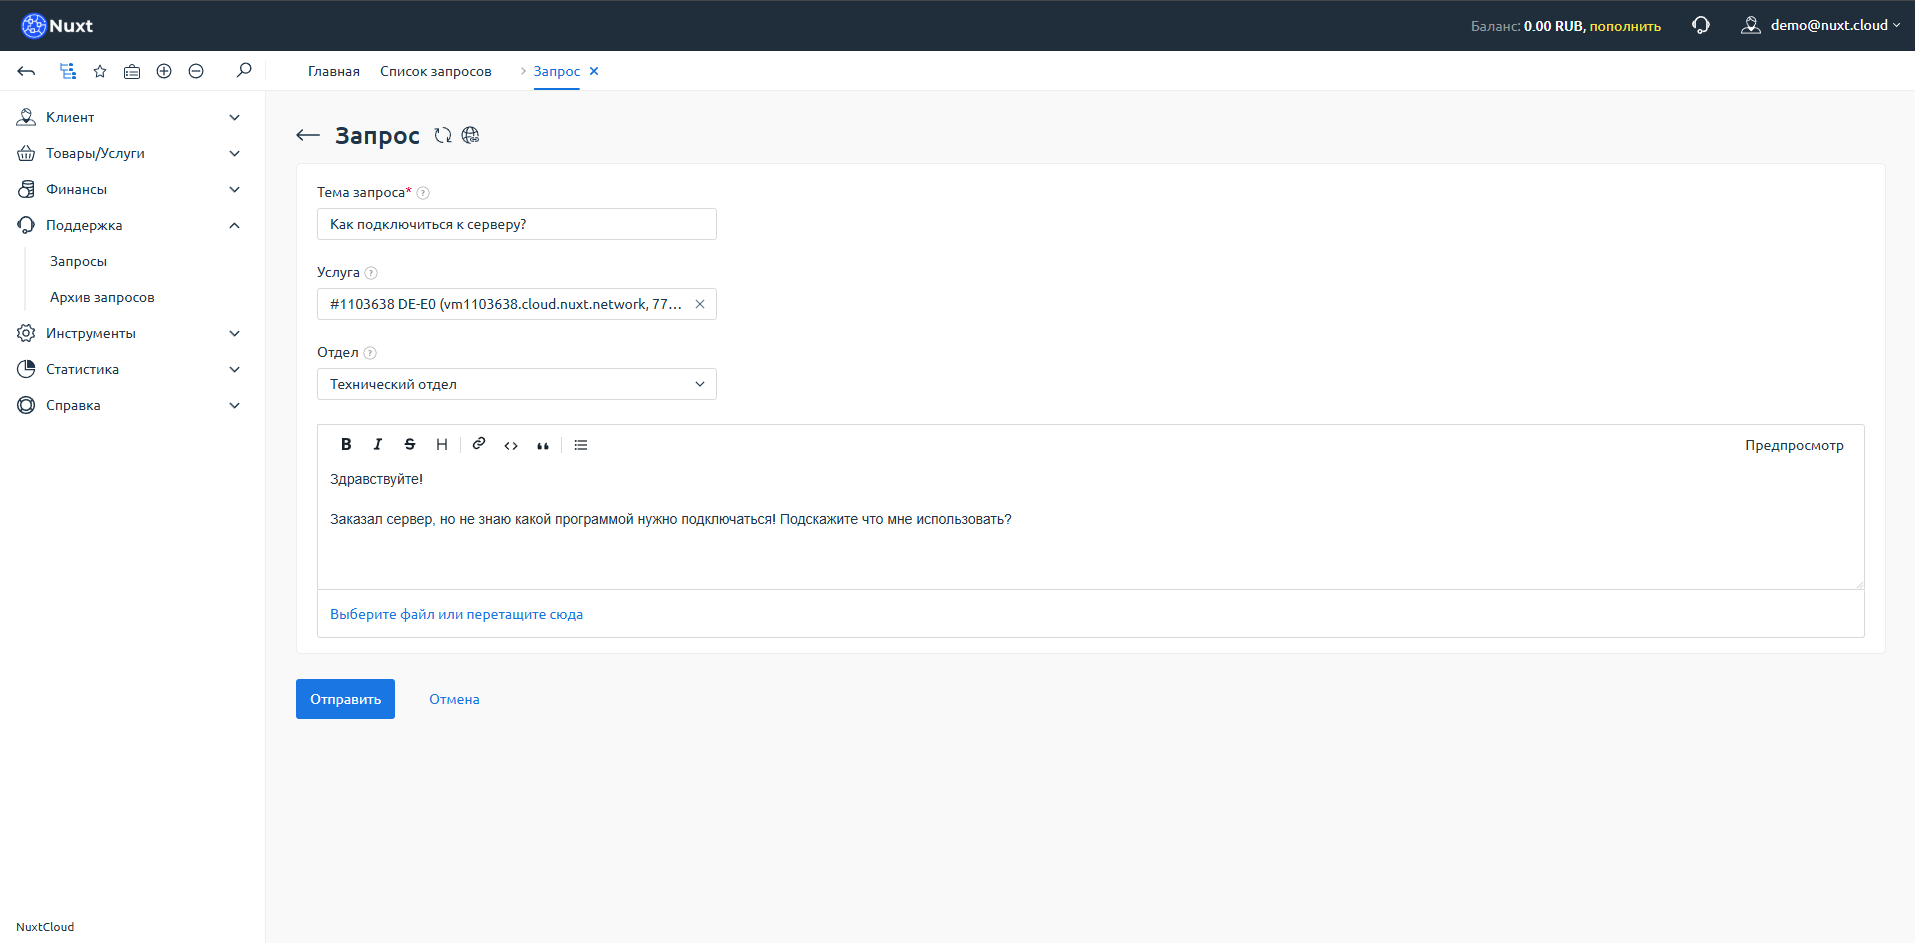
Step 4: Submit the request
After filling in all fields, click the "Submit" button.
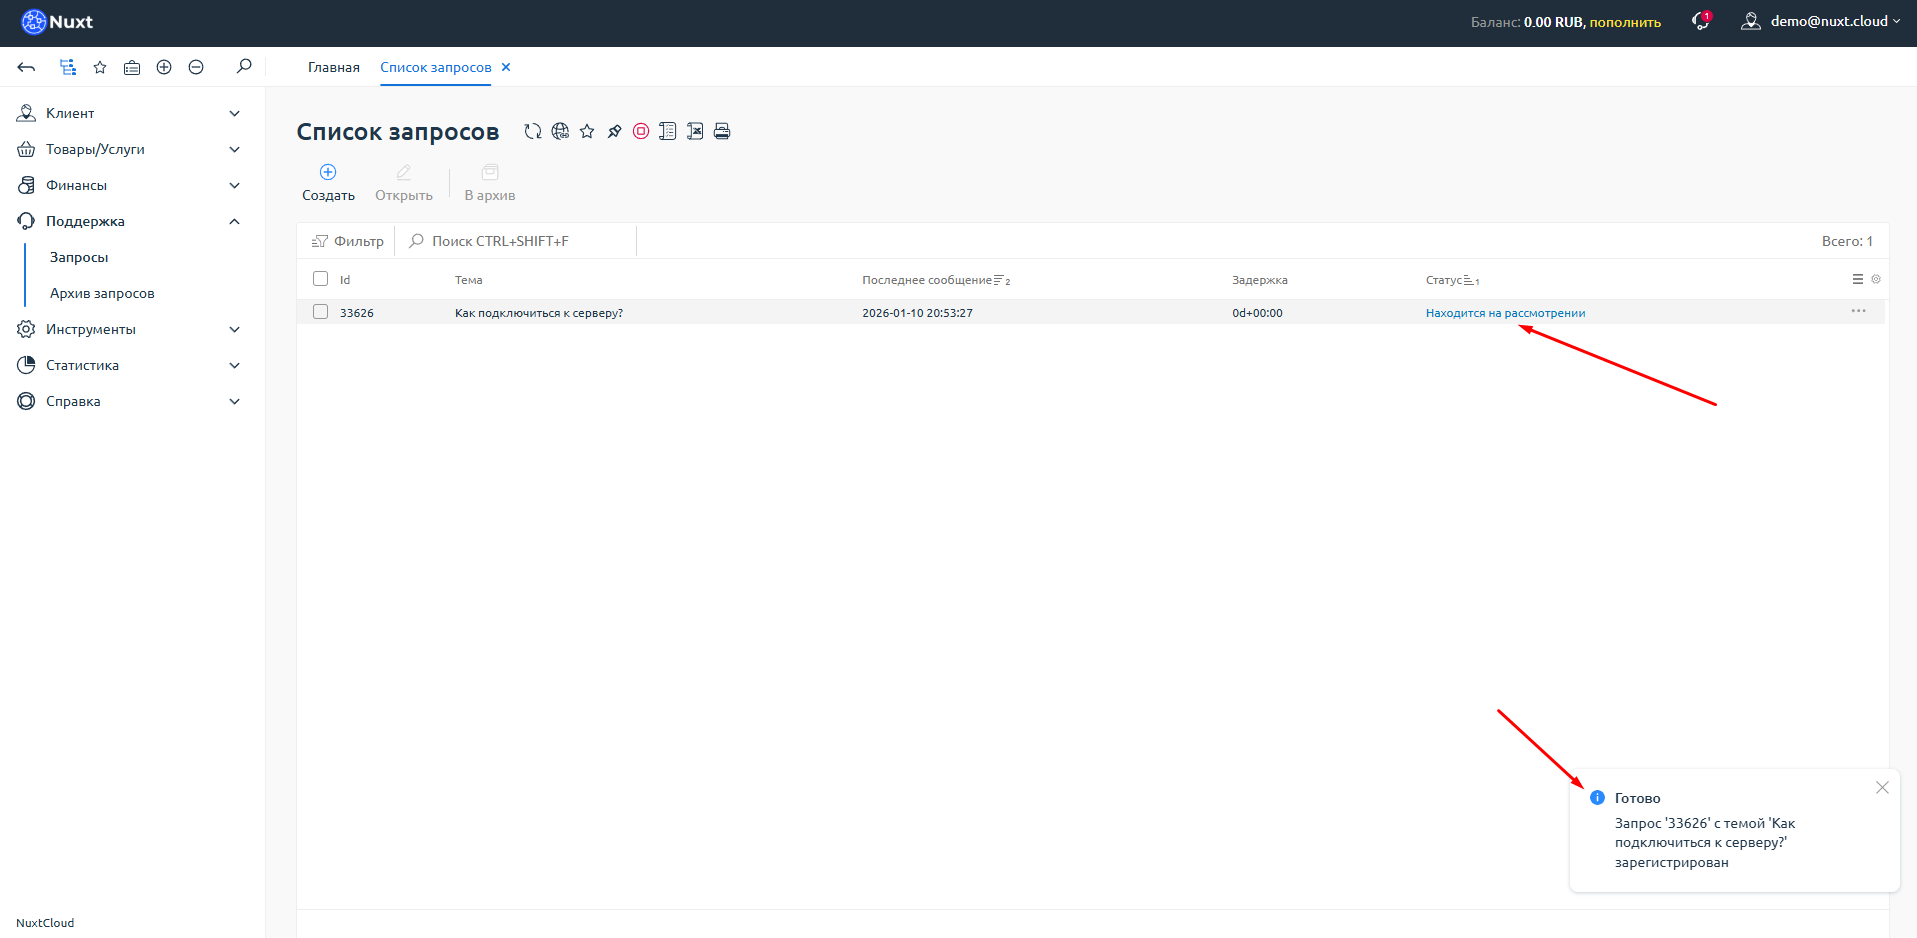
You will be redirected to the request list, where the current status of your request is displayed. A new request will have the status "Under review".
Step 5: Monitor the response
To view the response or add information, double-click on the desired request in the list. A support chat (ticket) will open.
In this window you can:
- Read the response from support
- Add additional information to the request
- Ask follow-up questions

Done!
Your request has been created. Wait for a response from the support team.